

What Goes Wrong With IKEA Kitchen Installs (And How to Avoid It)
IKEA SEKTION cabinets are well-engineered. The system is forgiving in some places and unforgiving in others, and DIY installs (and amateur contractor installs) tend to fail in the same predictable spots. Every year, we get dozens of calls to fix poor installations. So after 30 years and over 100,000 cabinets installed across Southern California, here’s our key advice to avoid the common pitfalls.
1. No wall is perfectly plumb — and the suspension rail will tell on you. The SEKTION suspension rail mounts to the wall and the cabinets hang from it. If the rail is level but the wall is wavy, bows, or is not perfectly square (hint: it never is!), the cabinet faces won't sit flush and you’ll notice these imperfections at the end of the project.
OUR FIX: use shims to ensure a true vertical reference plane, not to the wall.
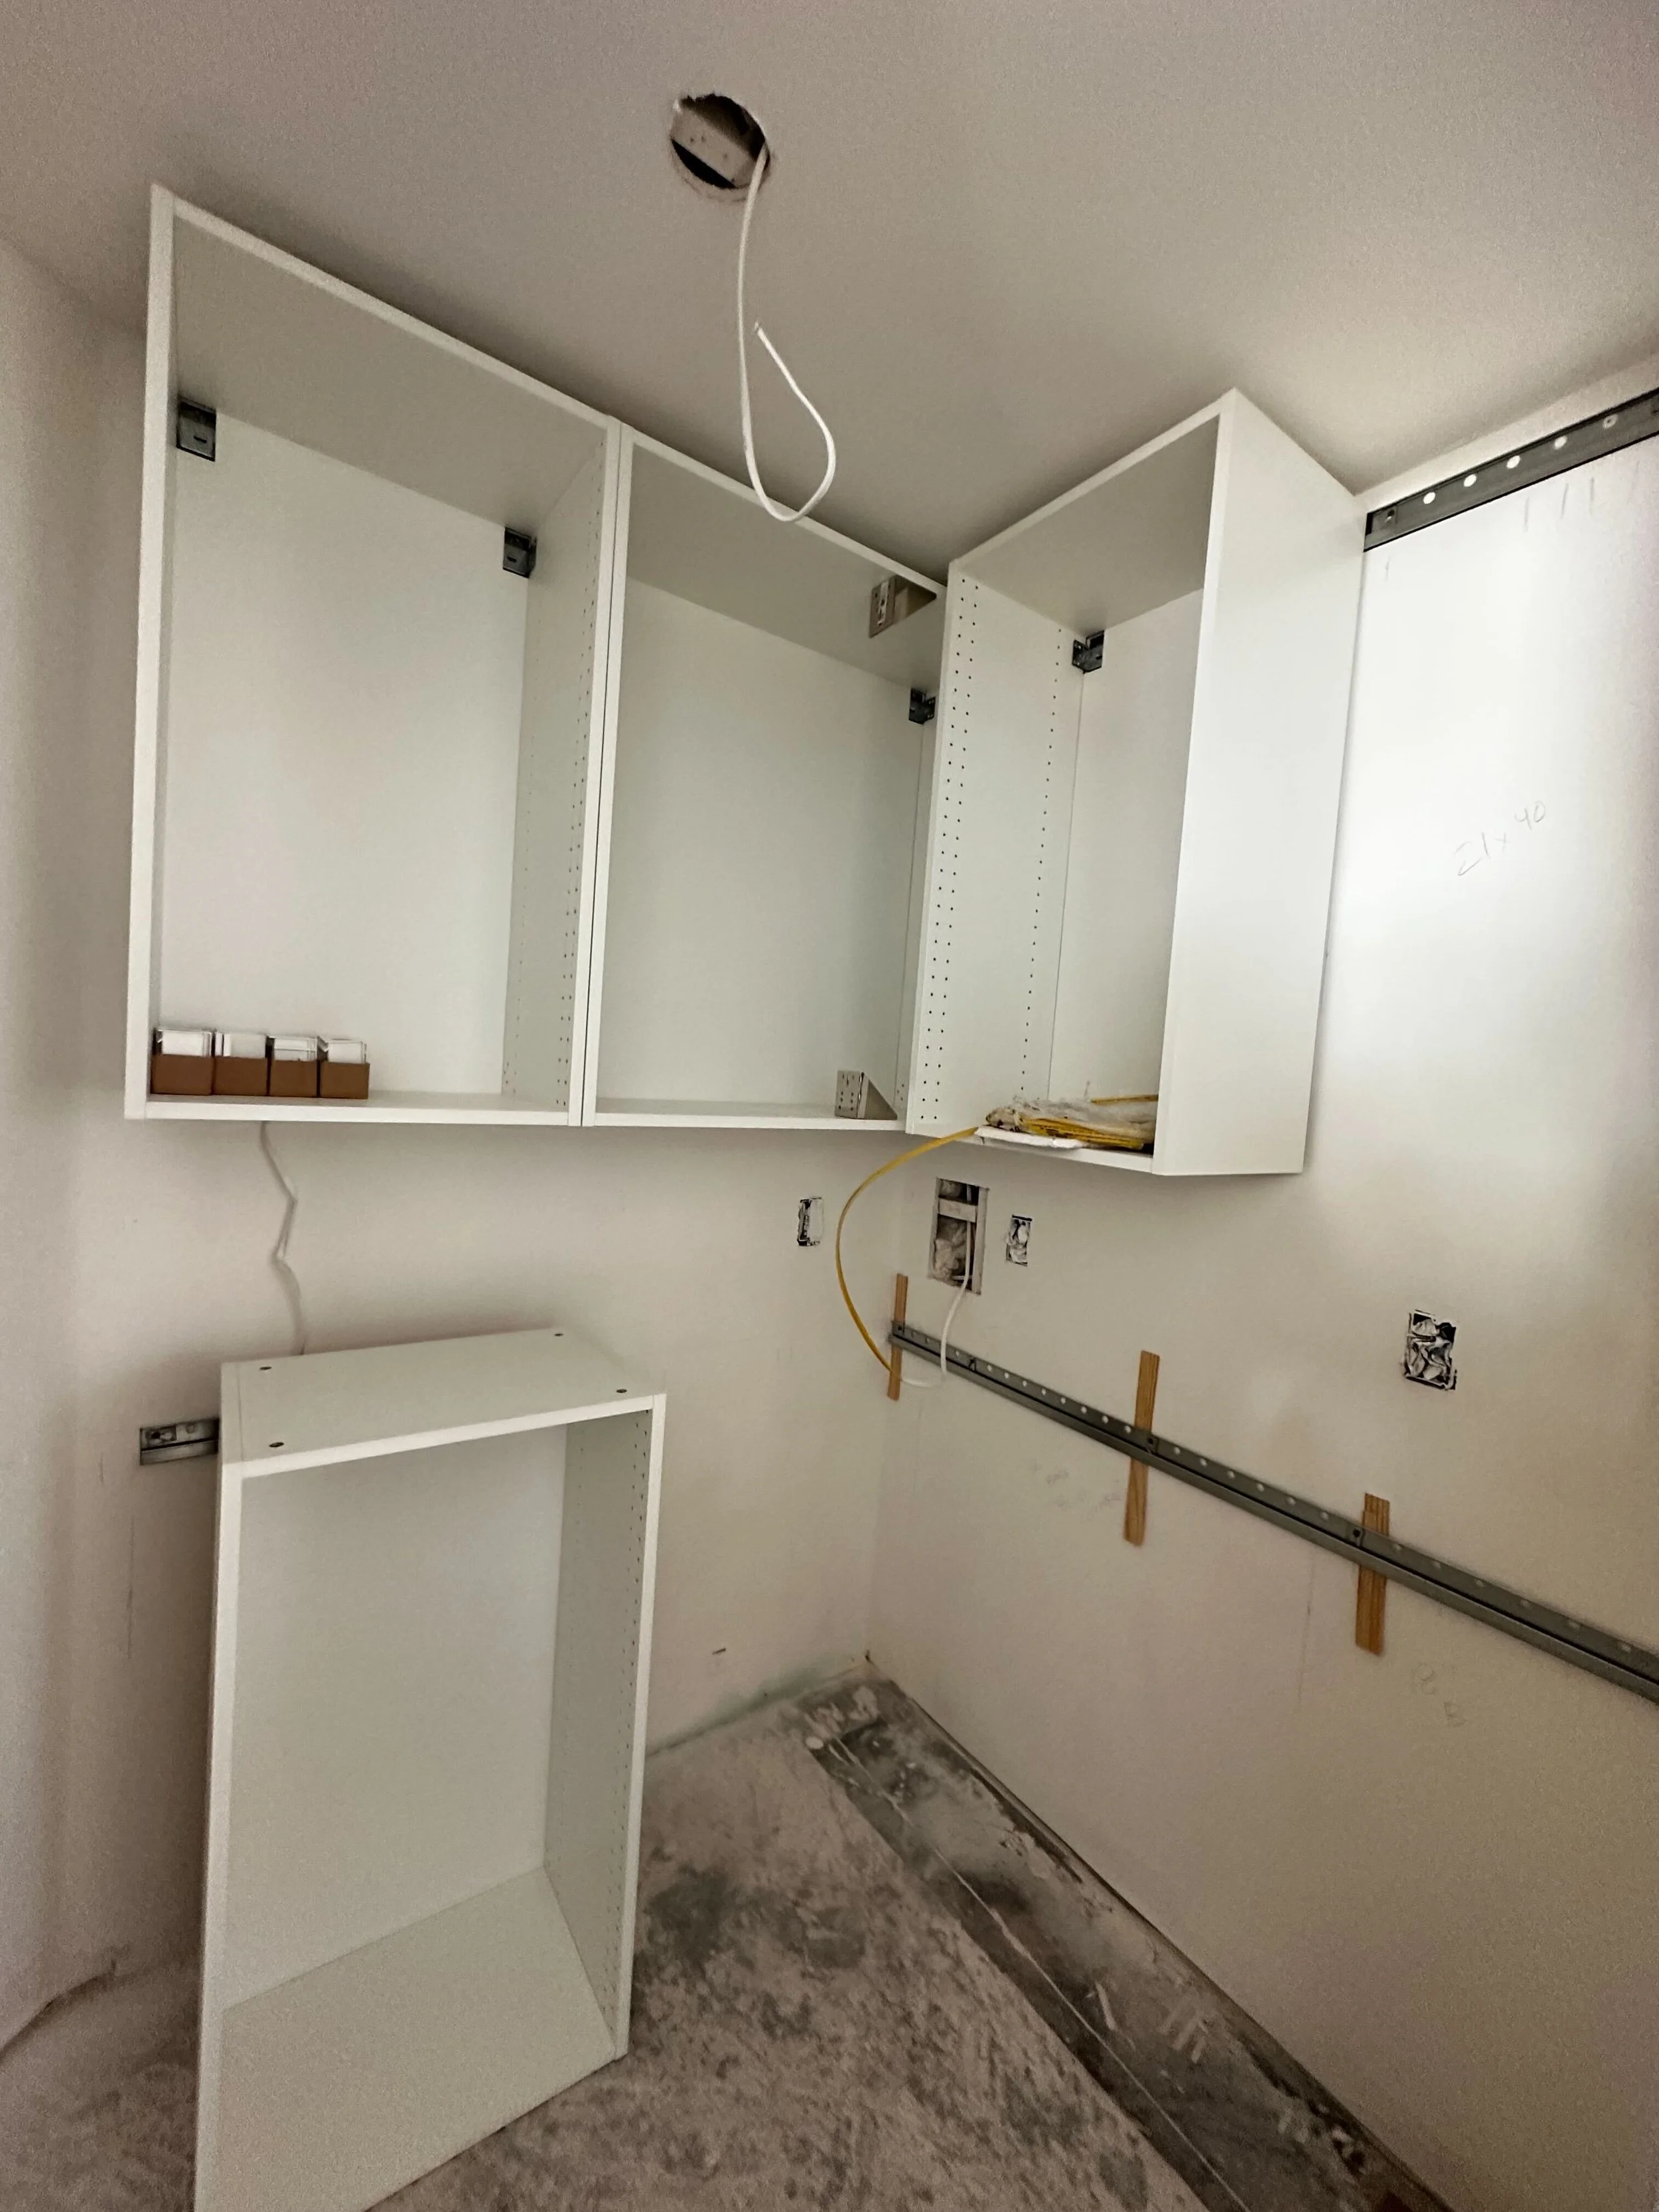
Use wood shims to ensure the IKEA Sektion rail is plumb and without any bows.
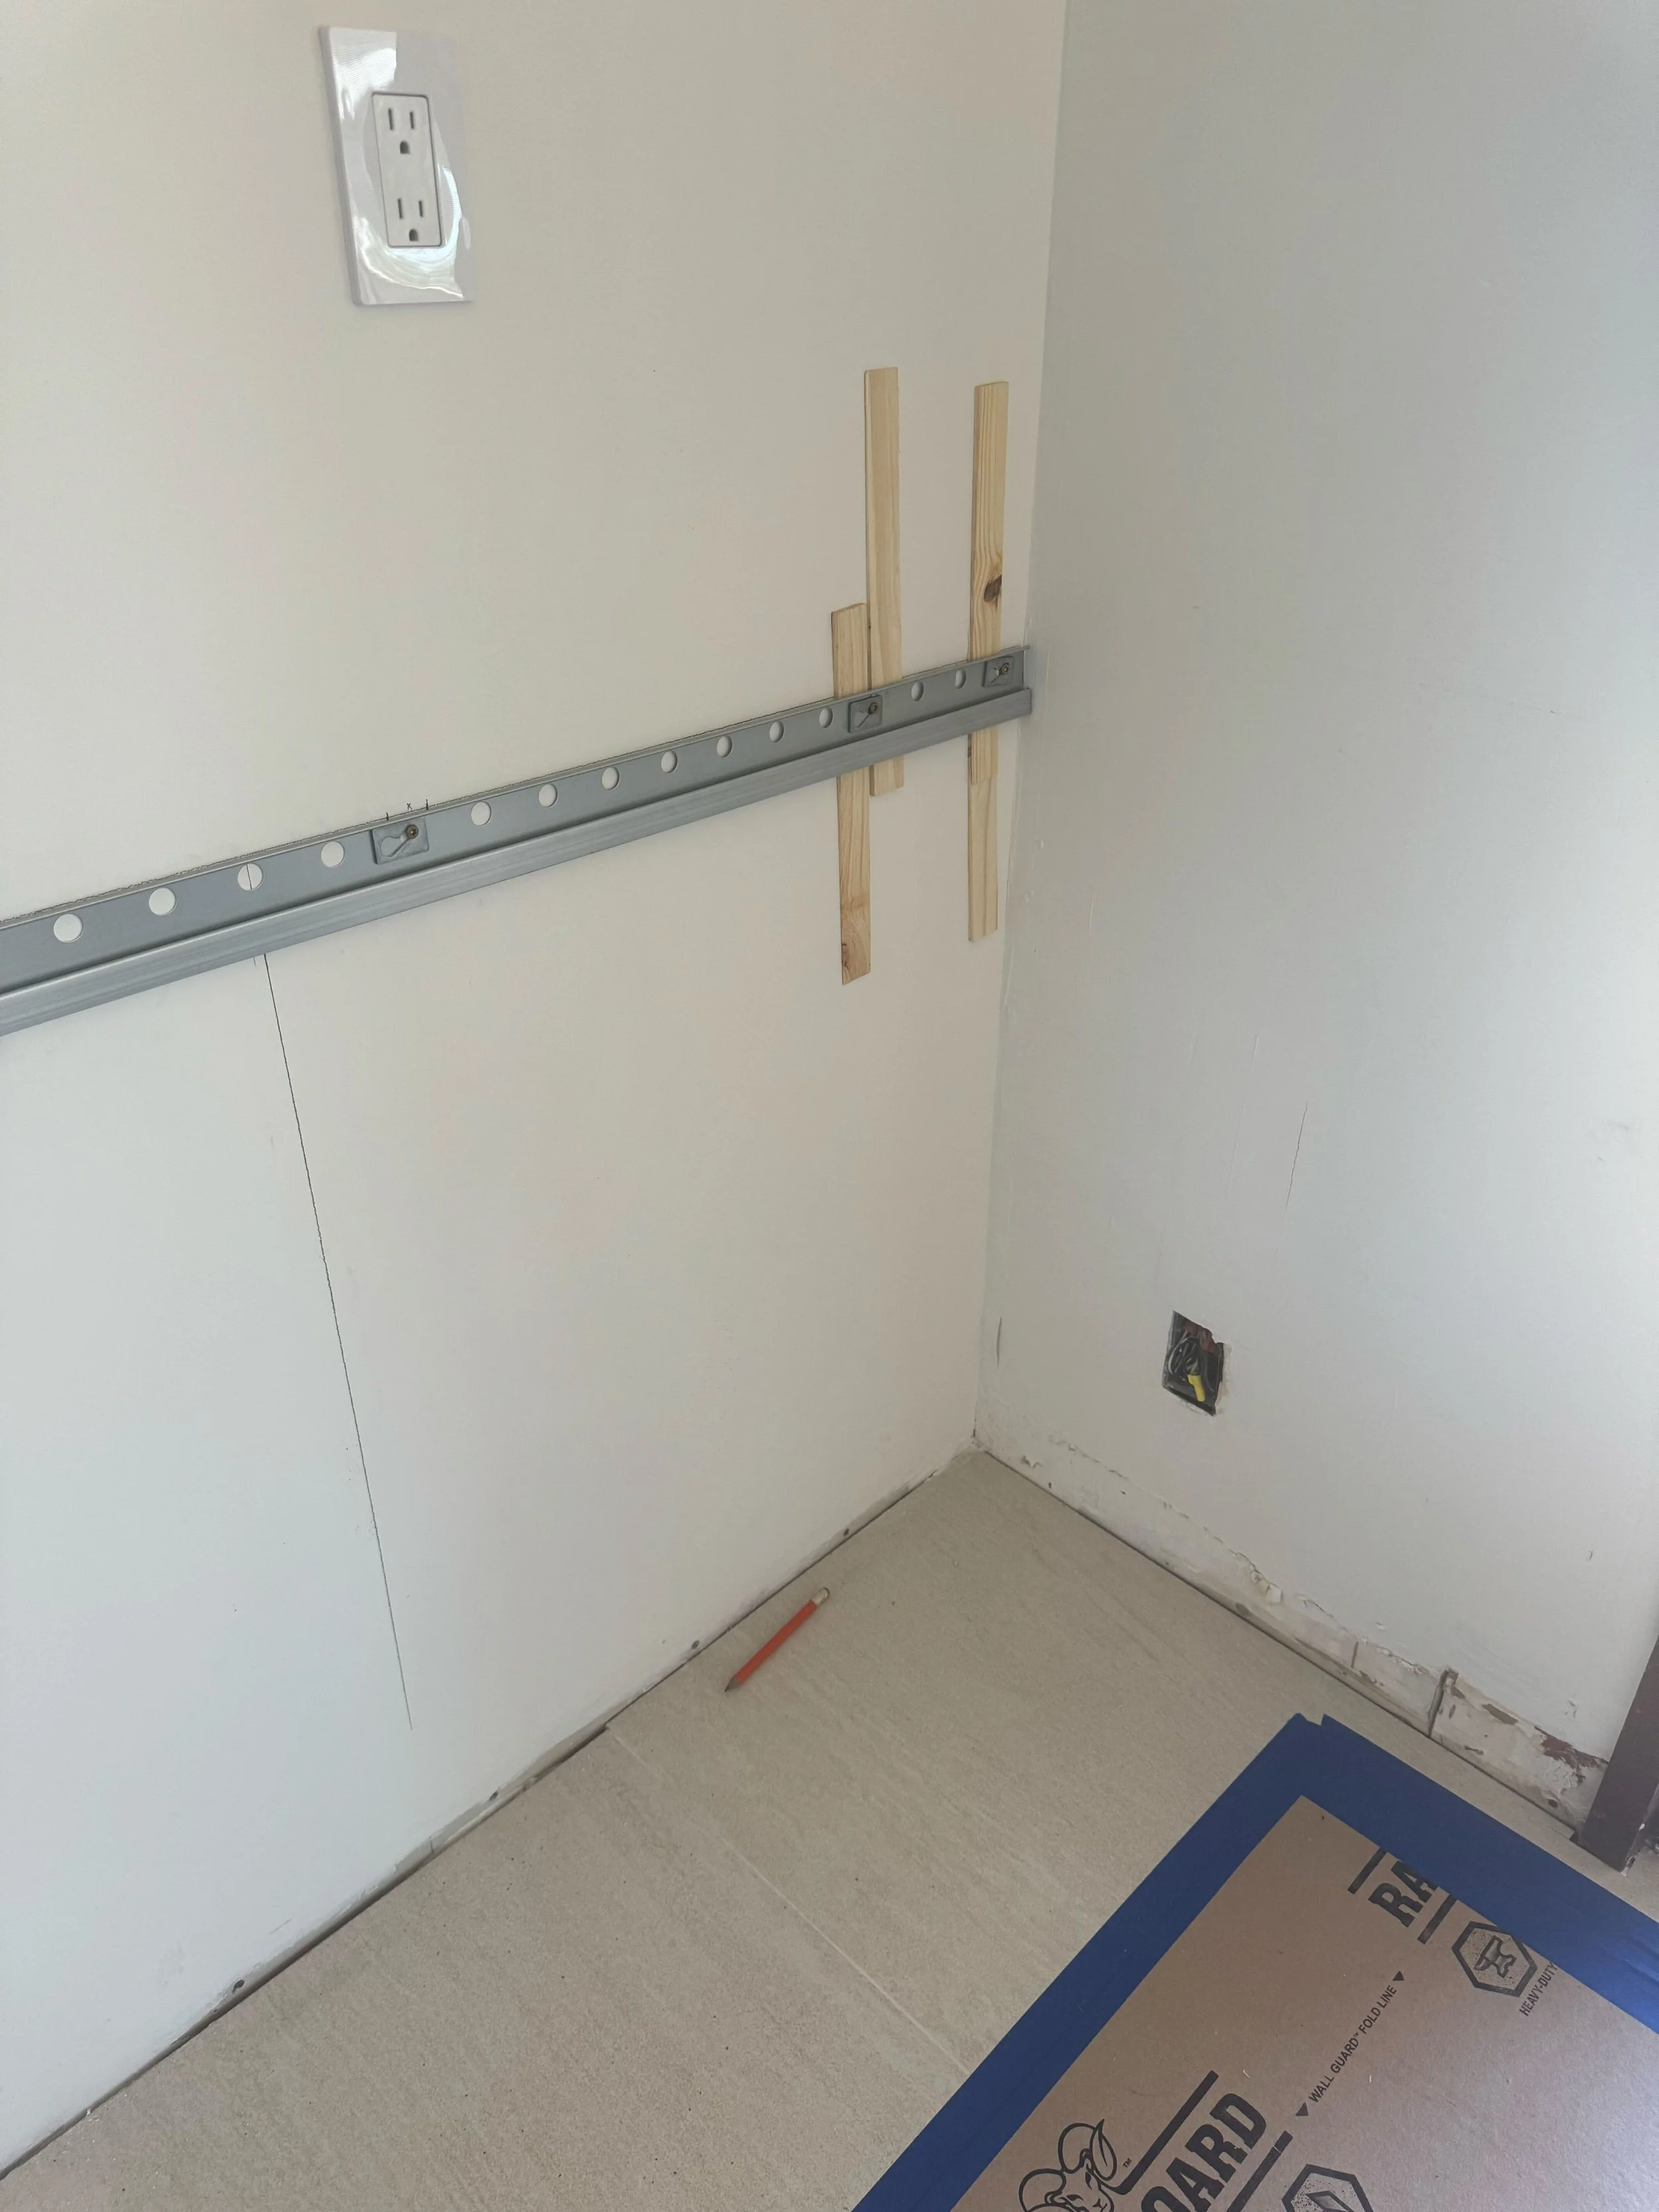
Use wood shims to ensure the IKEA Sektion rail is plumb and without any bows.
2. Insufficient or incorrect material. The IKEA Kitchen planning software is great. We love it so much, we have over 700 designs on our own account and we’ve designed thousands over the years. But like all software, there are some glitches. This results in improper procurement, frustrating trips to IKEA to pick “just one more thing” and an insufficient installation.
OUR FIX: Once your design is plan and a material list is created, work directly with an experienced IKEA installer like ourselves to make sure that you have sufficient legs, the right cover panels for your design and the correct filler & trim material. Do not return any extra or incorrect material until the project is fully completed.
3. Assembly without squaring. A lot of our clients ask to assemble the cabinets themselves – either they love building IKEA things or they want a discount. Regardless of the motivation, the cabinet assembly is typically the first step and also one of the most important steps – when done right it helps the installation go smoothly. If done poorly, you will pay (but usually not realizing it until the end). If the cabinets are not assembled perfectly square, once you install the cabinet frames and “dress out” with doors and drawers, everything will be out of alignment, and you may find yourself wanting to punch a wall out of frustration.
OUR FIX: Assemble cabinets according to product instructions and check each cabinet is square. Use a framing square and check diagonal measurements to maintain perfectly square cabinets.
4. Base cabinets installed when floors are out of level. Like walls, most floors are either slopped or have high and low spots throughout your kitchen. If your finished floor is out of level by even 1/4" over six feet, your toe-kick and countertop will look very crooked. Do not set your base cabinets’ heights from the random points on the floor. This will lead to many headaches.
OUR FIX: If using a laser, use the laser line as a reference. If not using a laser, identify the high spots and low spots on the floor and set your base cabinet height accordingly based on these reference points, keeping in mind that high spots will effectively lower your toekick and finished heights, and low spots will do the opposite.
5. Take care when cutting panels and fillers. Cutting panels and fillers is the most technical part of the installation. “Measure twice, cut once” has never been more important. This is where scribing panels to walls and cutting fillers tight to cabinet frames is very important and will make or break the installation.
OUR FIX: whether using a table saw or track saw, always use new/sharp blades. Pro tip: use blue/orange tape where you are cutting to avoid chipping.
6. Know your reveals – and keep them consistent. IKEA cabinets require side panels and trim, which are installed relative to the cabinet frame. This is one of the most visible elements when looking at the finished kitchen and it’s where we see the biggest difference between amateur installations and professional installations.
OUR FIX: Bottom line, hire an expert who works with IKEA SEKTION cabinets frequently. If going for flush paneling, use 3/4” to 13/16” reveals from the cabinet frame to the front of the panels. For standard IKEA installation (as in most IKEA showrooms), use 5/8” reveals.
When to DIY vs. hire a professional
Installing a single cabinet or random cabinets in a garage can be relatively easy for people who are handy and like building things. However, while the cabinet hardware and door hinges are forgiving; the compounding details of ensuring proper height, plumb lines, equal reveals, quality carpentry, and squared cabinets of a full kitchen are not.
FAQ
Q: Should I install my own IKEA kitchen?
A: Most full kitchens with appliances and stone tops benefit from a pro. One-off cabinets or garage storage can be reasonably DIY.
Q: How long does a pro IKEA install take?
A: Typical kitchen installations take between 4 - 8 working days, depending on size, complexity, and job site conditions.
Q: What's the most common DIY mistake?
A: Setting the suspension rail to the wall instead of to a true plumb line, and assembling cabinets without ensuring they are perfectly square.